Lee H.Badman, Wirednot, Dec. 28th, 2013
A few weeks back, I was invited by Colasoft to take a look at their Capsa 7 Enterpriseanalyzer. Having a little time off around the holidays, I finally got around to spending a couple of hours with the product. This hardly constitutes an in-depth review, but I can share some of the first impressions this interesting and powerful tool made on me during playtime.
I was vaguely familiar with Colasoft, having looked at some of their rather nifty freebies (like a multi-host ping tool) in the past. Wanting to get oriented before digging in, I popped in on the website to see what the promise of Capsa 7 Enterprise amounts to. Lifted from Colasoft’spages:
Key Features of Capsa Enterprise:
- Real-time packet capture as well as the ability to save data transmitted over local networks, including wired network and wireless network like802.11a/b/g/n;
- Identify and analyze more than 500 network protocols, as well as network applications based on the protocol analysis;
- Identify “Top Talkers” by monitoring network bandwidth and usage by capturing data packets transmitted over the network and providing summary and decoding information about these packets;
- Overview Dashboard allows you to view network statistics at a single glance, allowing for easy interpretation of network utilization data;
- Monitor and save Internet e-mail and instant messaging traffic, helping identify security and confidential data handling violations;
- Diagnose and pinpoint network problems in seconds by detecting and locating suspicious hosts;
- Ability to Map the traffic, IP address, and MAC of each host on the network, allowing for easy identification of each host and the traffic that passes through each;
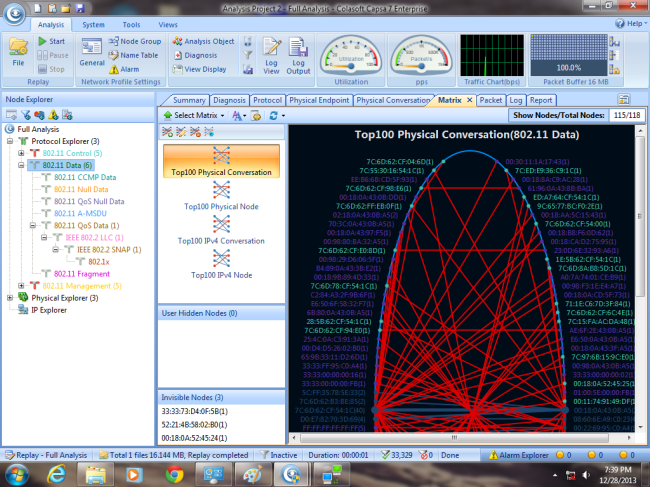
- Visualize the entire network in an ellipse that shows the connections and traffic between each host.
It’s a pretty ambitious feature set, for a $995 price tag. (“Enterprise” differs from “Professional” in that Professional doesn’t do WLAN.) Capsa is only available for Windows (all versions), and this is a laptop analysis tool rather than a datacenter-racked super-sleuther. Also- WLAN support includes up to 802.11n, but not .11ac yet.
That’s the intro, but how does the product actually perform? I’ll admit to being impressed.
Though I know my way around plenty of CLIs, I’m a UI guy- I hate sucky, confusing, ill-laid out interfaces. Colasoft passes my muster in this regard- Capsa 7 packs a surprising amount of analysis info into a peppy and nicely designed dashboard. Having little Ethernet in my home these days and not wanting to get up off my duff to set up a wired test scenario (it’s the holiday break, after all) I aimed most of my tire-kicking at my home WLAN environment (currently a mix of Aerohive and Meraki). As with any analysis tool, you start by selecting your adapter, and in this case a WLAN channel and one or more SSIDs, and off you go- no AirPcap needed or any sort of special drivers (I tested it with a number of adapters, all did well).
You get variety of analysis profiles to pick from (Full, Traffic Monitoring, Security, HTTP, Email, DNS, FTP, Instant Messaging), and deep views into the gory details of 802.11/802.3 packets as you would with any competing tool. You also get just a nice range of different views that feel AirMagnet-y (or WildPackets-y) at times, but what you don’t get is any of the spectrum type channel plots that MetaGeek gives. Short of that, Capsa 7 is pretty comprehensive.
My “testing” amounted to generating a bunch of nothing-special network traffic both locally and across the Internet, and then drilling into it looking for anyplace I might want to go for analysis that Capsa fell short on. There just wasn’t any.
I am intrigued enough to play further, and my fully-functional eval copy will also get turned loose on my big WLAN when I get back to work to see how it does in the presence of an enterprise-grade 802.1x Wi-FI environment with a ridiculous order of magnitude more clients than I have at home. If there is anything good or bad to add, I’ll come back and amend this post.
Meanwhile, Colasoft does make Capsa 7 available for free 15-day trials.
If you’re in the market for a decent all-in-one wired/wireless analyzer, AND you don’t need 11ac support, AND you run Windows, you might want to have a look at Capsa 7 Enterprise.